
Mark or erase an area
Mark or erase a block, a box or a hand-drawn shape in one go.
What you'll do: mark, or take away, a whole area of stitches with one tap or one drag.
Before you start
Finish setup and open the stitching screen. The Area tool sits in the tool strip down the left.
Steps
- Choose the Area tool. It starts on 10×10 and Mark. To change either, tap the Area button again to open the picker.
- Pick a shape: 10×10, Box or Lasso. Then pick an action: Mark or Erase.
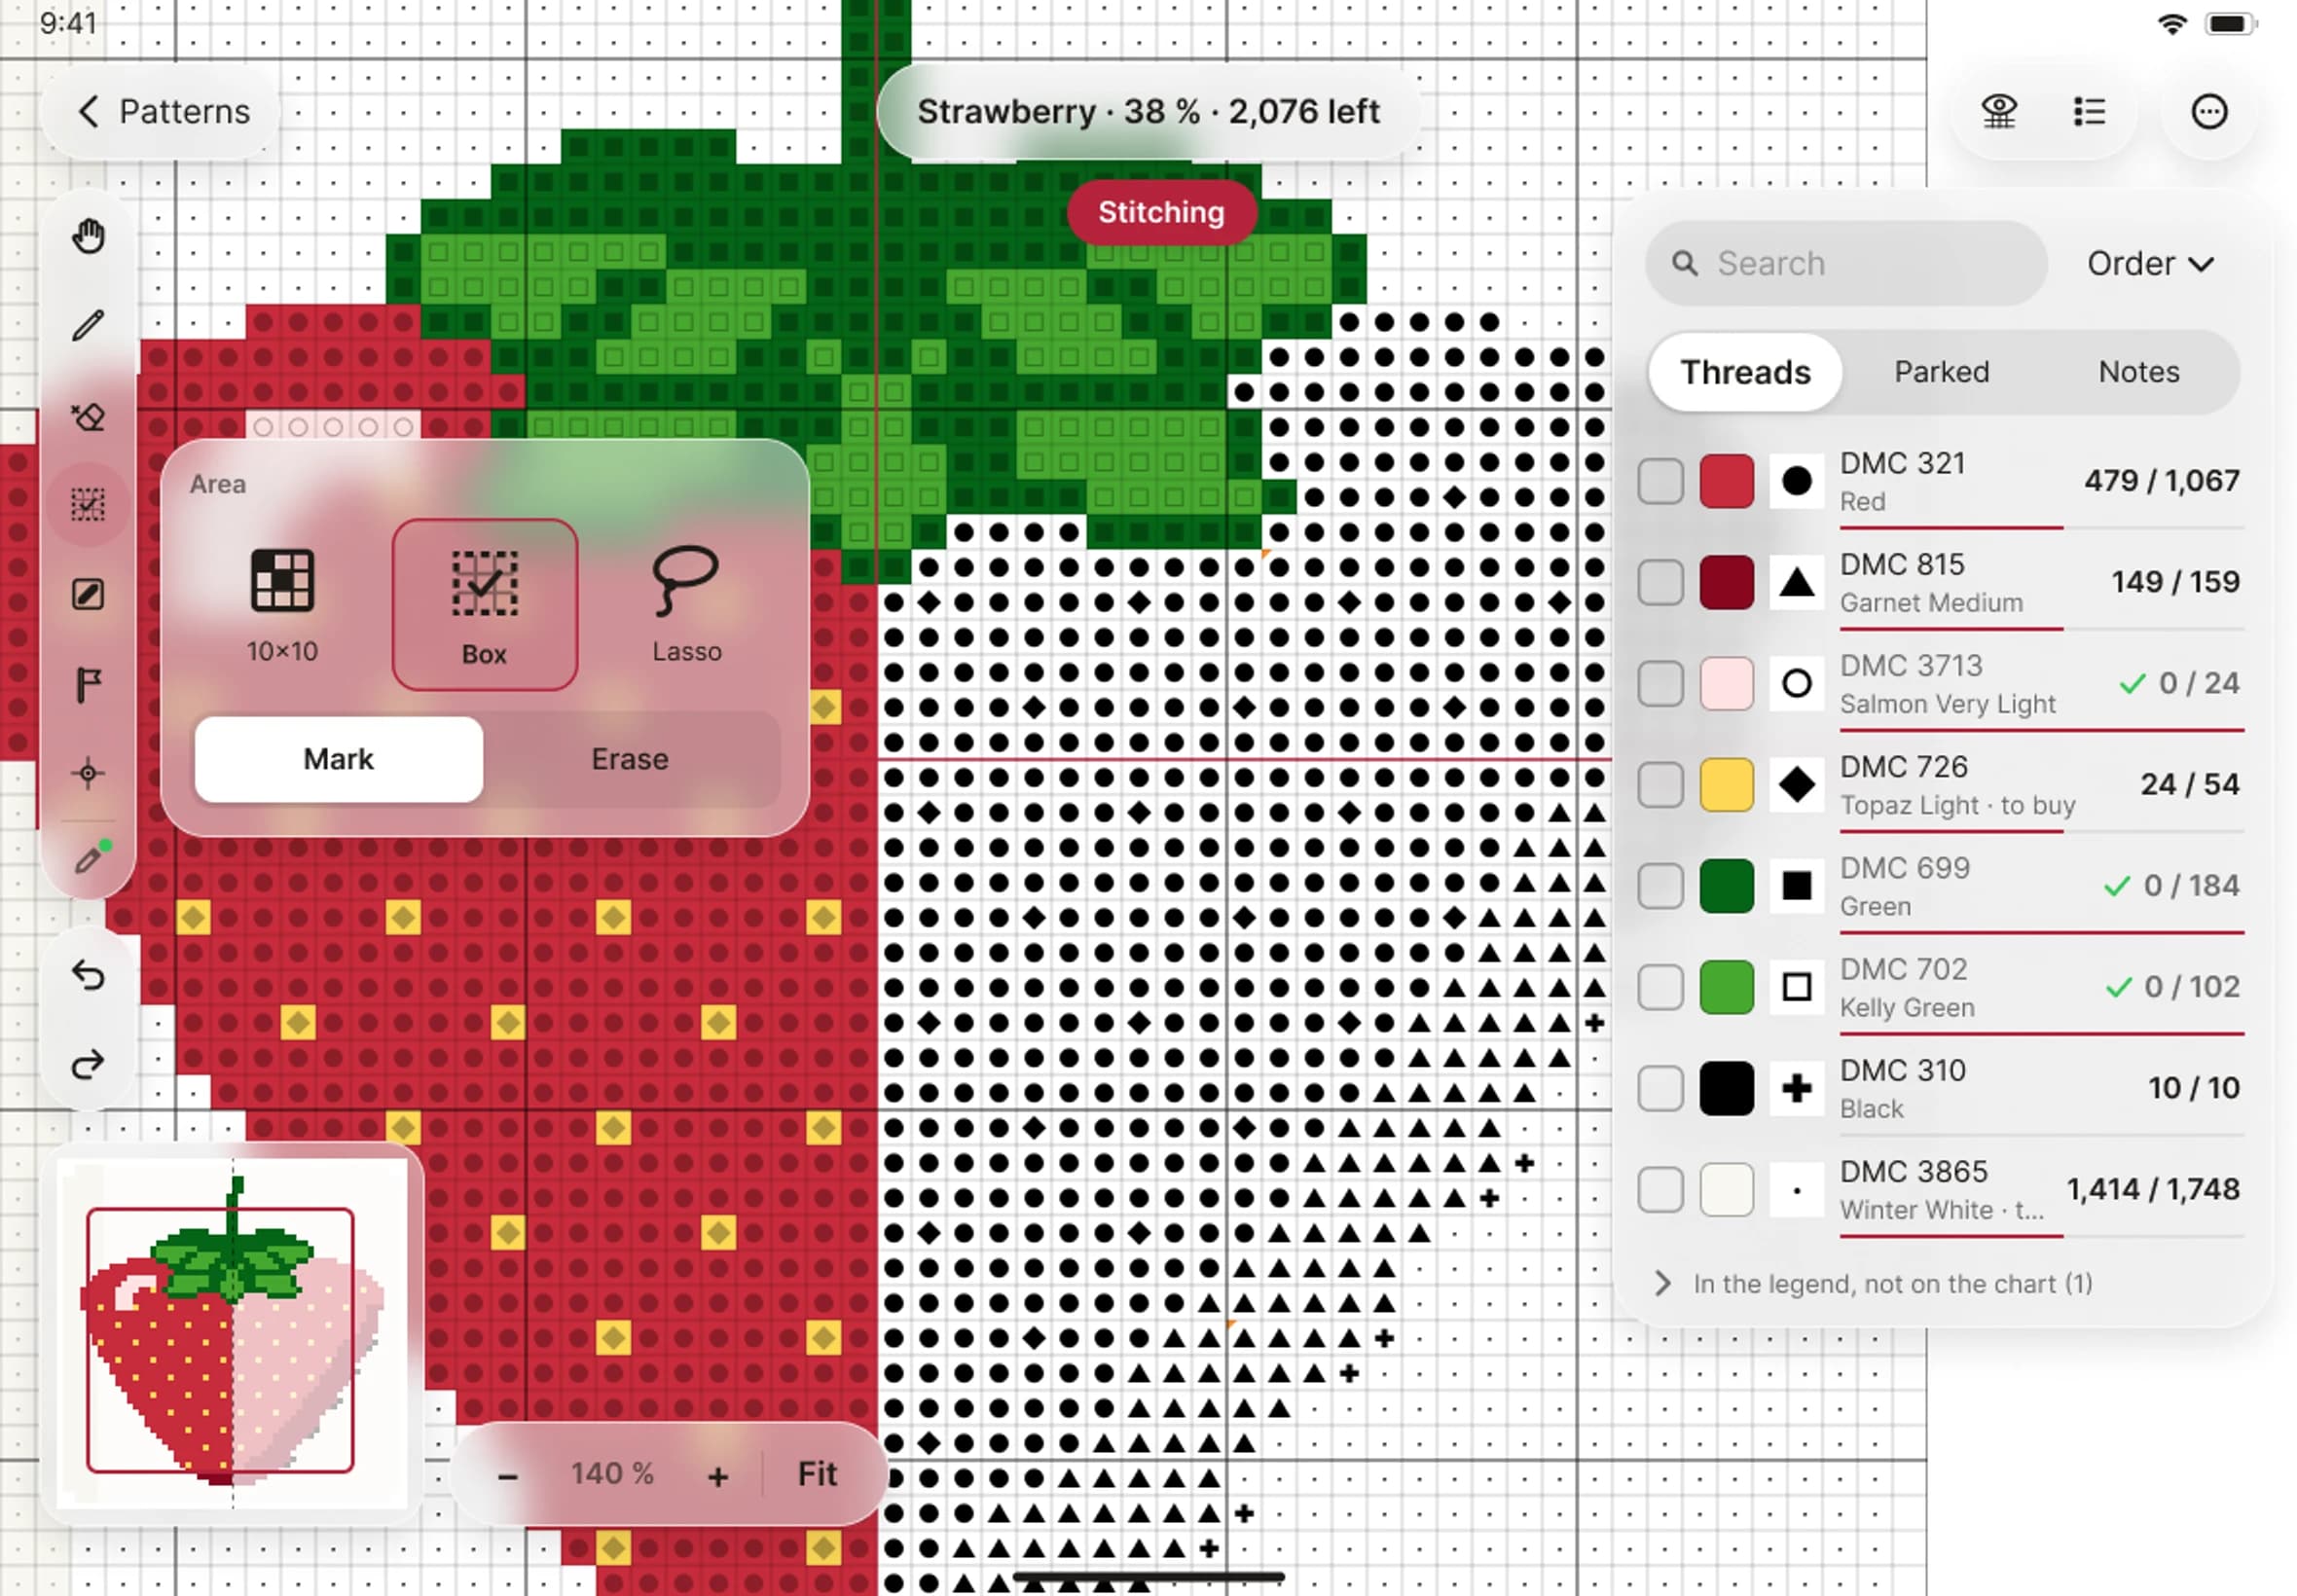
- For 10×10, tap any square. The whole block between the chart's heavier lines is marked.
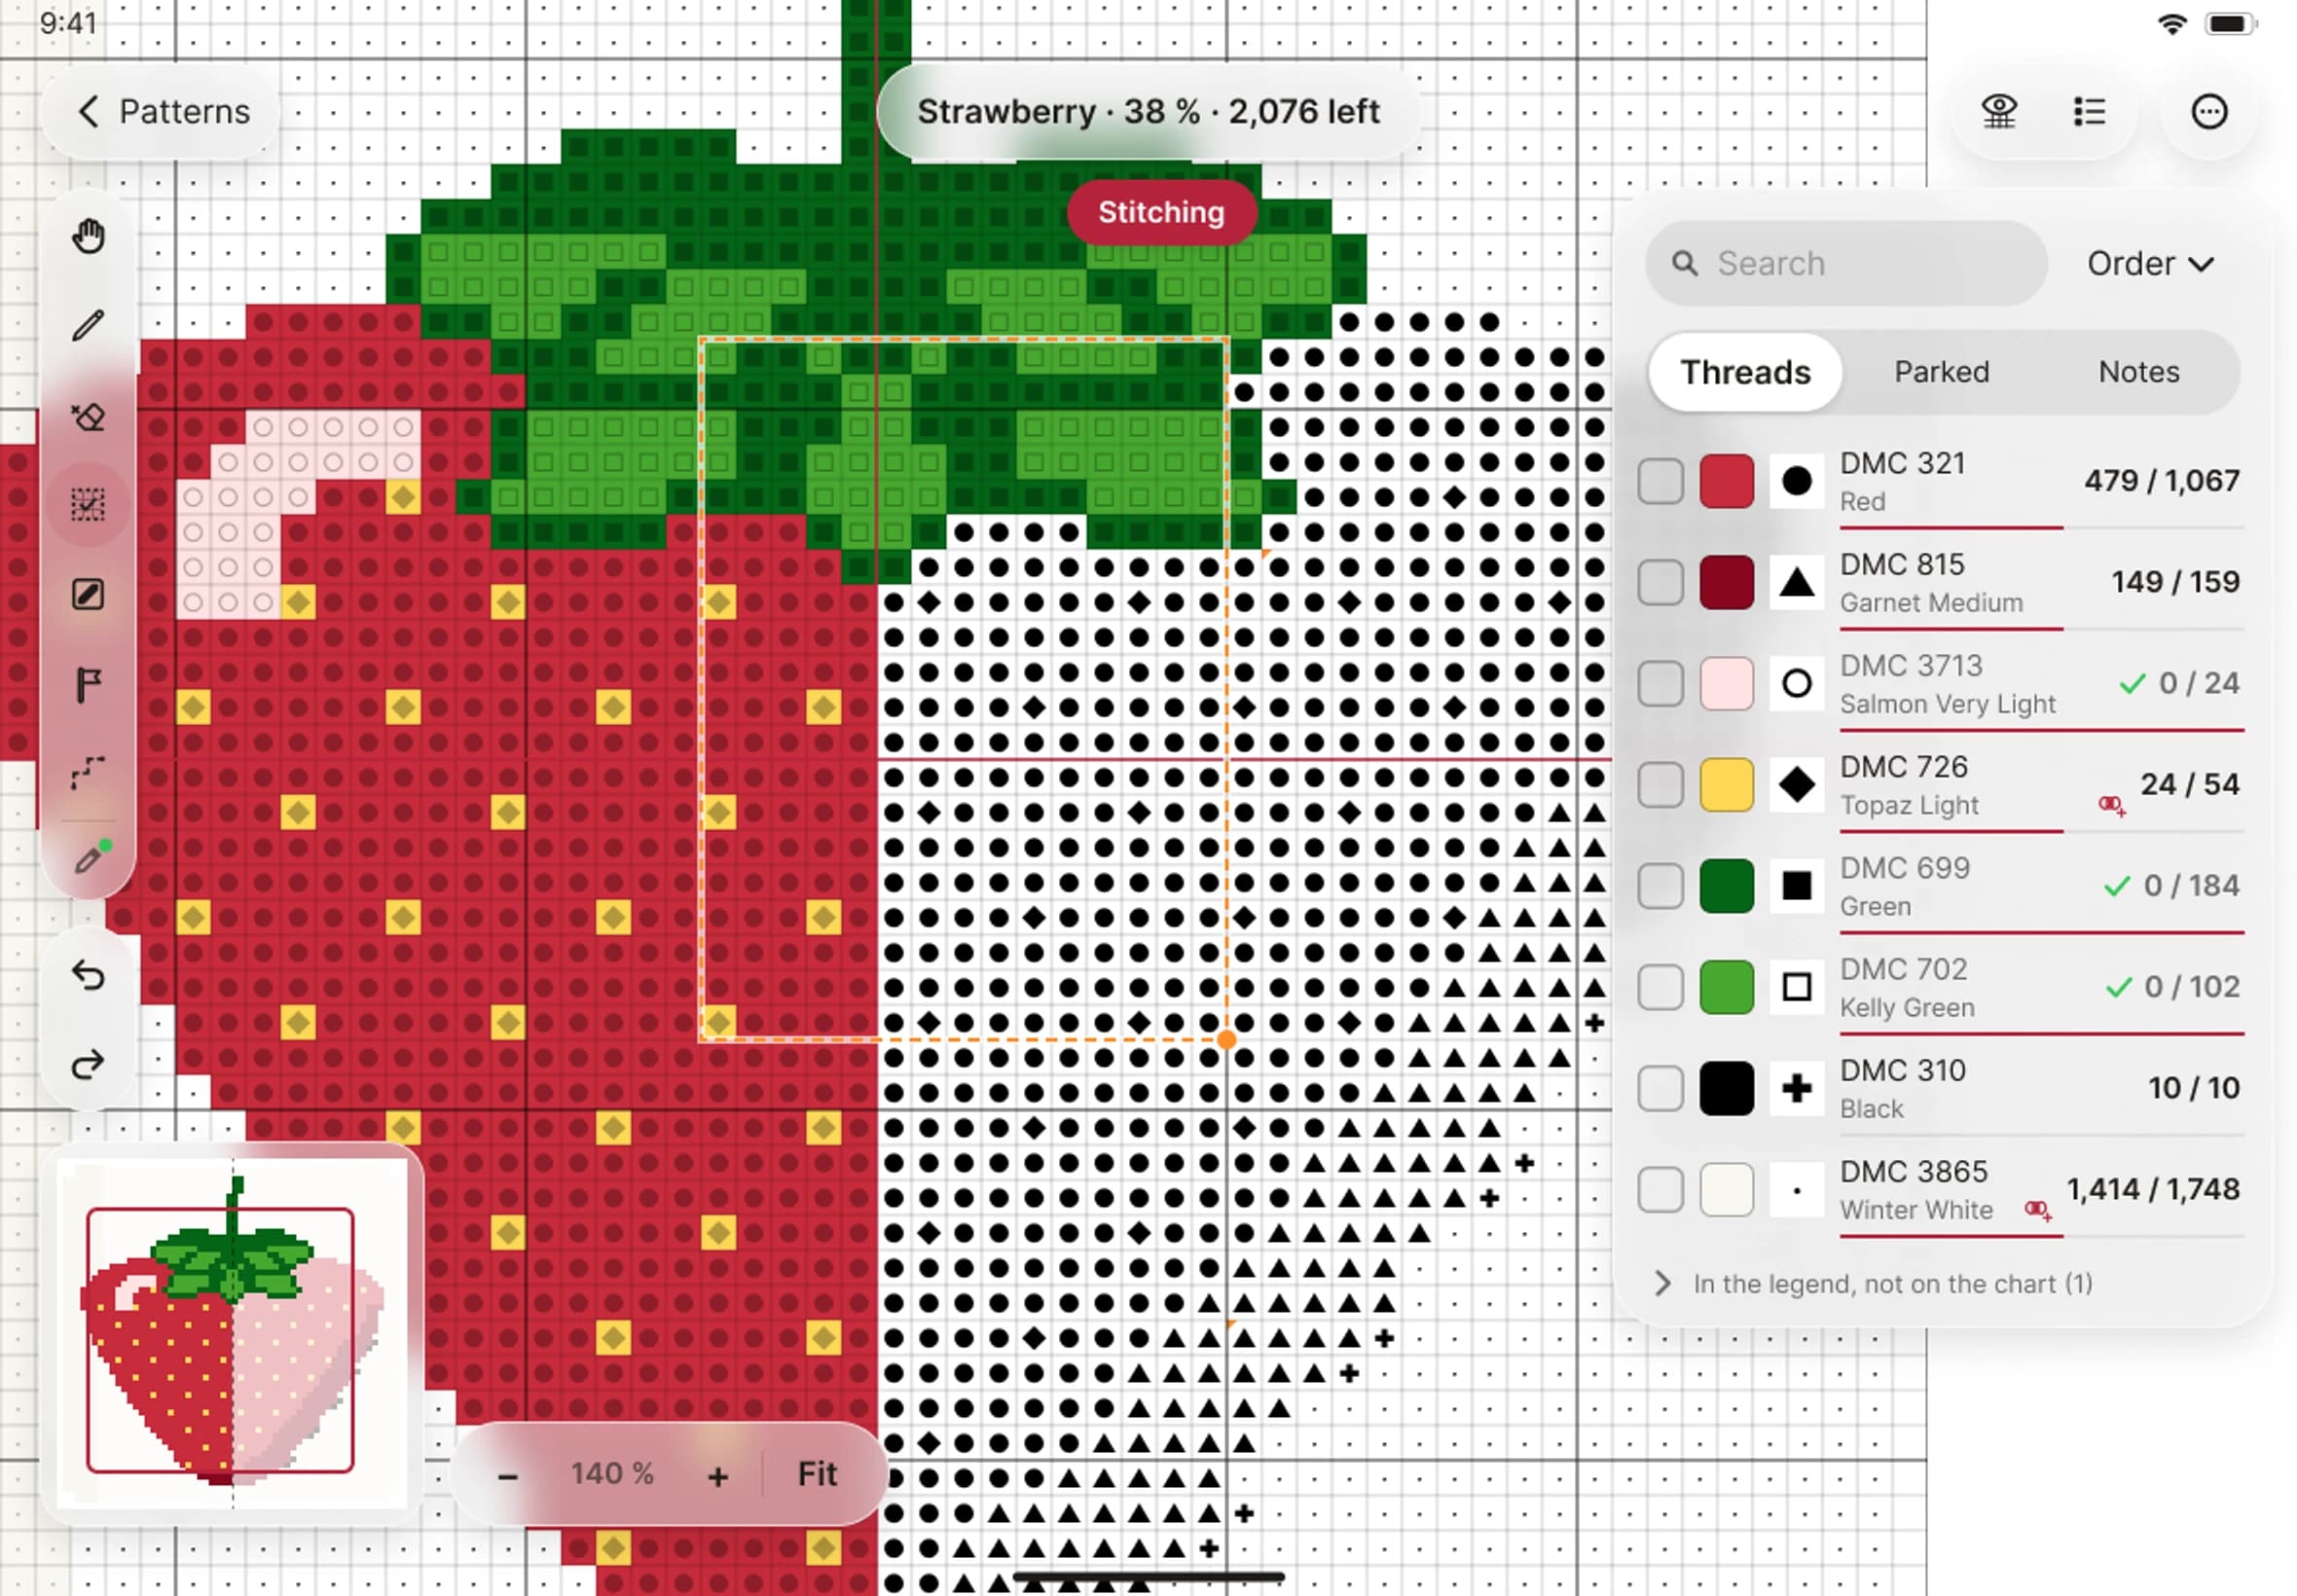
- For Box, press on one corner and drag to the opposite corner. Every square in the rectangle is marked, including the two corners.
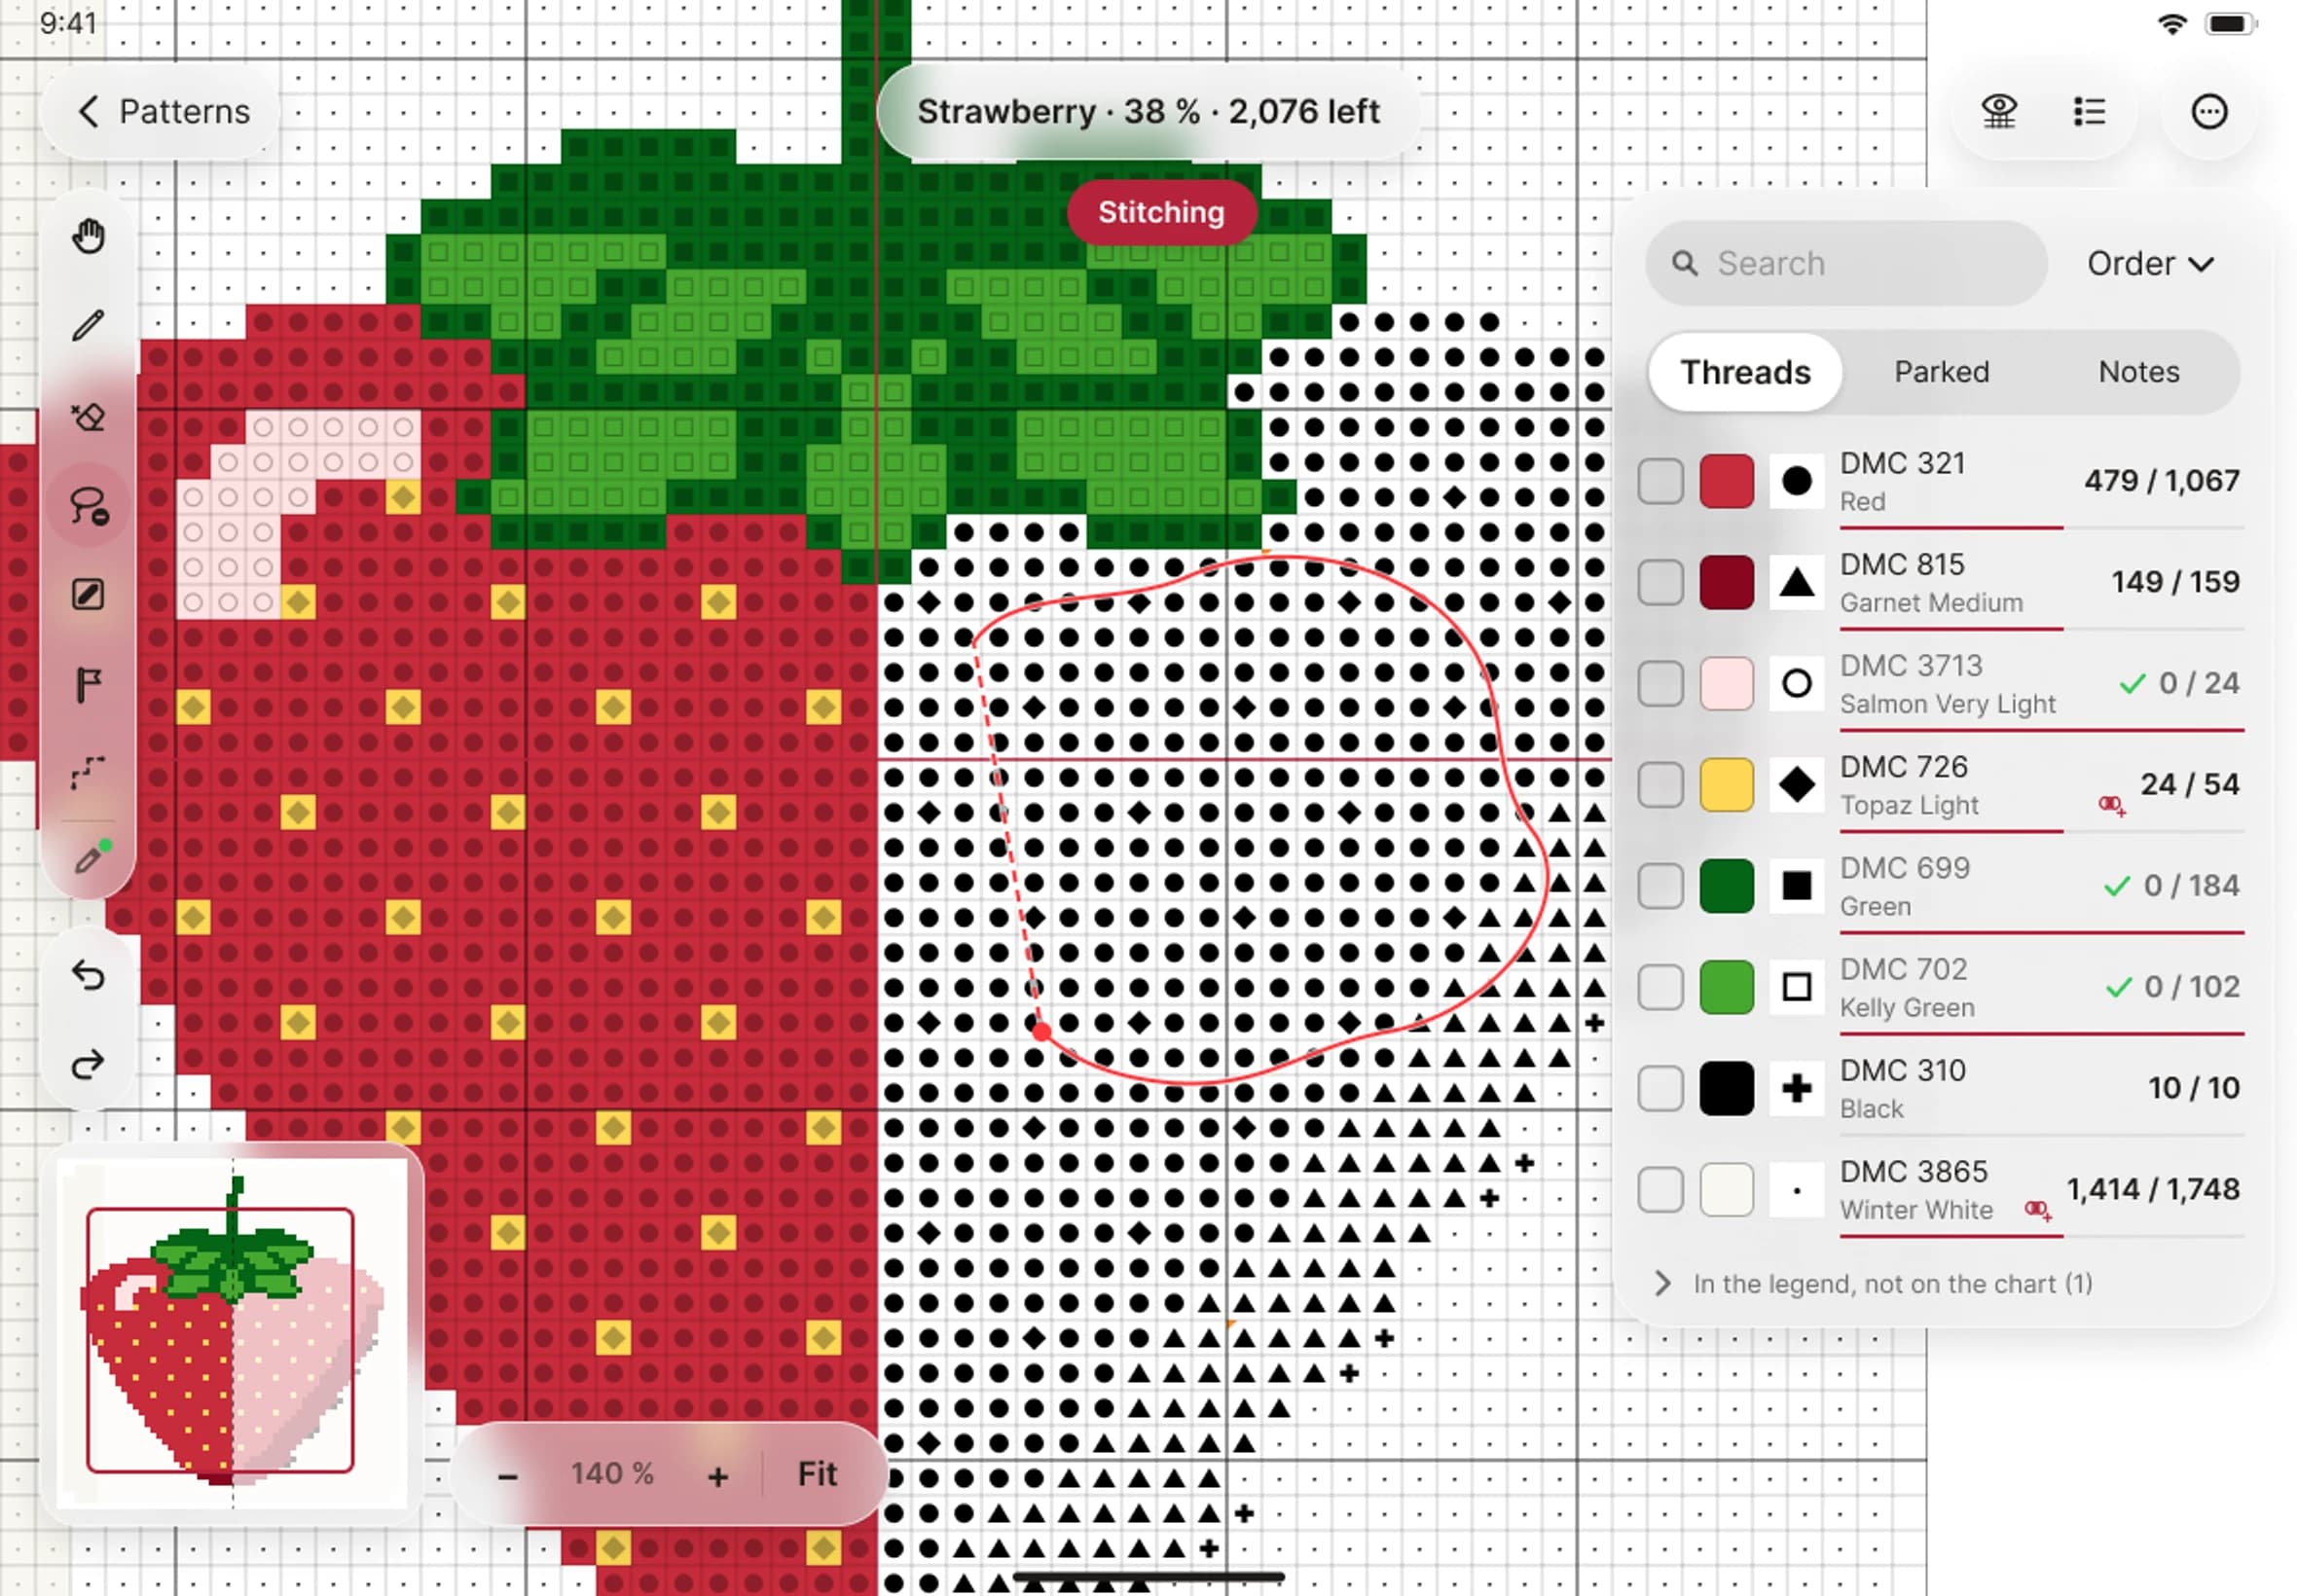
- For Lasso, draw round the stitches you want. When you lift your finger, the shape closes with a straight line back to where you began, and every square whose centre is inside it is marked. A shape that crosses itself leaves no holes.
- To take stitches away, switch to Erase and use any shape the same way.